Not an easy job. These clutches may (or may not) have been on there for 50-odd years and some more than others are reluctant to come apart.
I am indebted to Barrie for his postings which put me on the right track - the most important being the fact that the outer aluminium bell housing is threaded on, and IS LEFT HAND THREAD (ie: clockwise to remove). I looked at Barrie's instructions (involving wedges, time, and drinking tea??? WTF) and thought (respectfully), there might be a better way.
So I did a bit more research and then took the time to document what I did, for the benefit of those dealing with the same thing in the future.
First of all: the different clutches used on Hus ski's:
- the very early 200 (very rare) - Powerflo made by the Morse Chain Co. - uses 5 steel balls to move the outer sheave;
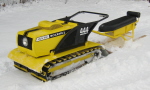
- 200(A) - relatively common - uses a proprietary clutch (made by Hus ski) - ** this is what I was dealing with, and is the one pictured below**
- 444 - uses a Salisbury 500 (this is a clutch assembly purchased by Hus ski from an outside manufacturer - in this case, Salisbury, who was the guy that developed the concept of the CVT clutch. I have worked on these in the past, and some of the techniques below may apply.
Step 1 (not pictured): remove clutch retaining bolt - standard RH thread (counter-clockwise to remove), 1" socket required;
Also: I had the motor bolted onto the cast aluminium motor mount, and clamped to the bench - and had put a rope into the cylinder to keep the crank from rotating.
Step 2 (photo 1) - make a special holder that will bolt onto the two bolt holes in the outer bell housing - in my case I used an old motorcycle fork tube as an extension. I used a propane torch to heat the area prior to using gentle pressure - REMEMBER, THIS IS LH THREAD ! CLOCKWISE TO REMOVE ! One of mine came off cleanly. The other was stiffer and some of the aluminium thread was left on the steel inner sheave threads. There isn't a lot you can do about this. Steel and aluminium do not like each other. Use heat and patience (turn off a bit, then back on, then off some more).
- Clutch 1 (800x600).jpg (423.53KiB)Viewed 26234 times
- Clutch 2 (800x600).jpg (337.52KiB)Viewed 26234 times
- Clutch 3 (800x600).jpg (434.89KiB)Viewed 26234 times
- Clutch 4 (800x600).jpg (352.3KiB)Viewed 26234 times
- Clutch 5 (800x600).jpg (394.31KiB)Viewed 26234 times

I am fairly new at posting photos etc. Hope this works, and hope this is of assistance.
If anyone wants to add there 2 cents worth, or if I stand corrected on anything here, please chime in.
Mike O'Reilly
Constance Bay, ON